


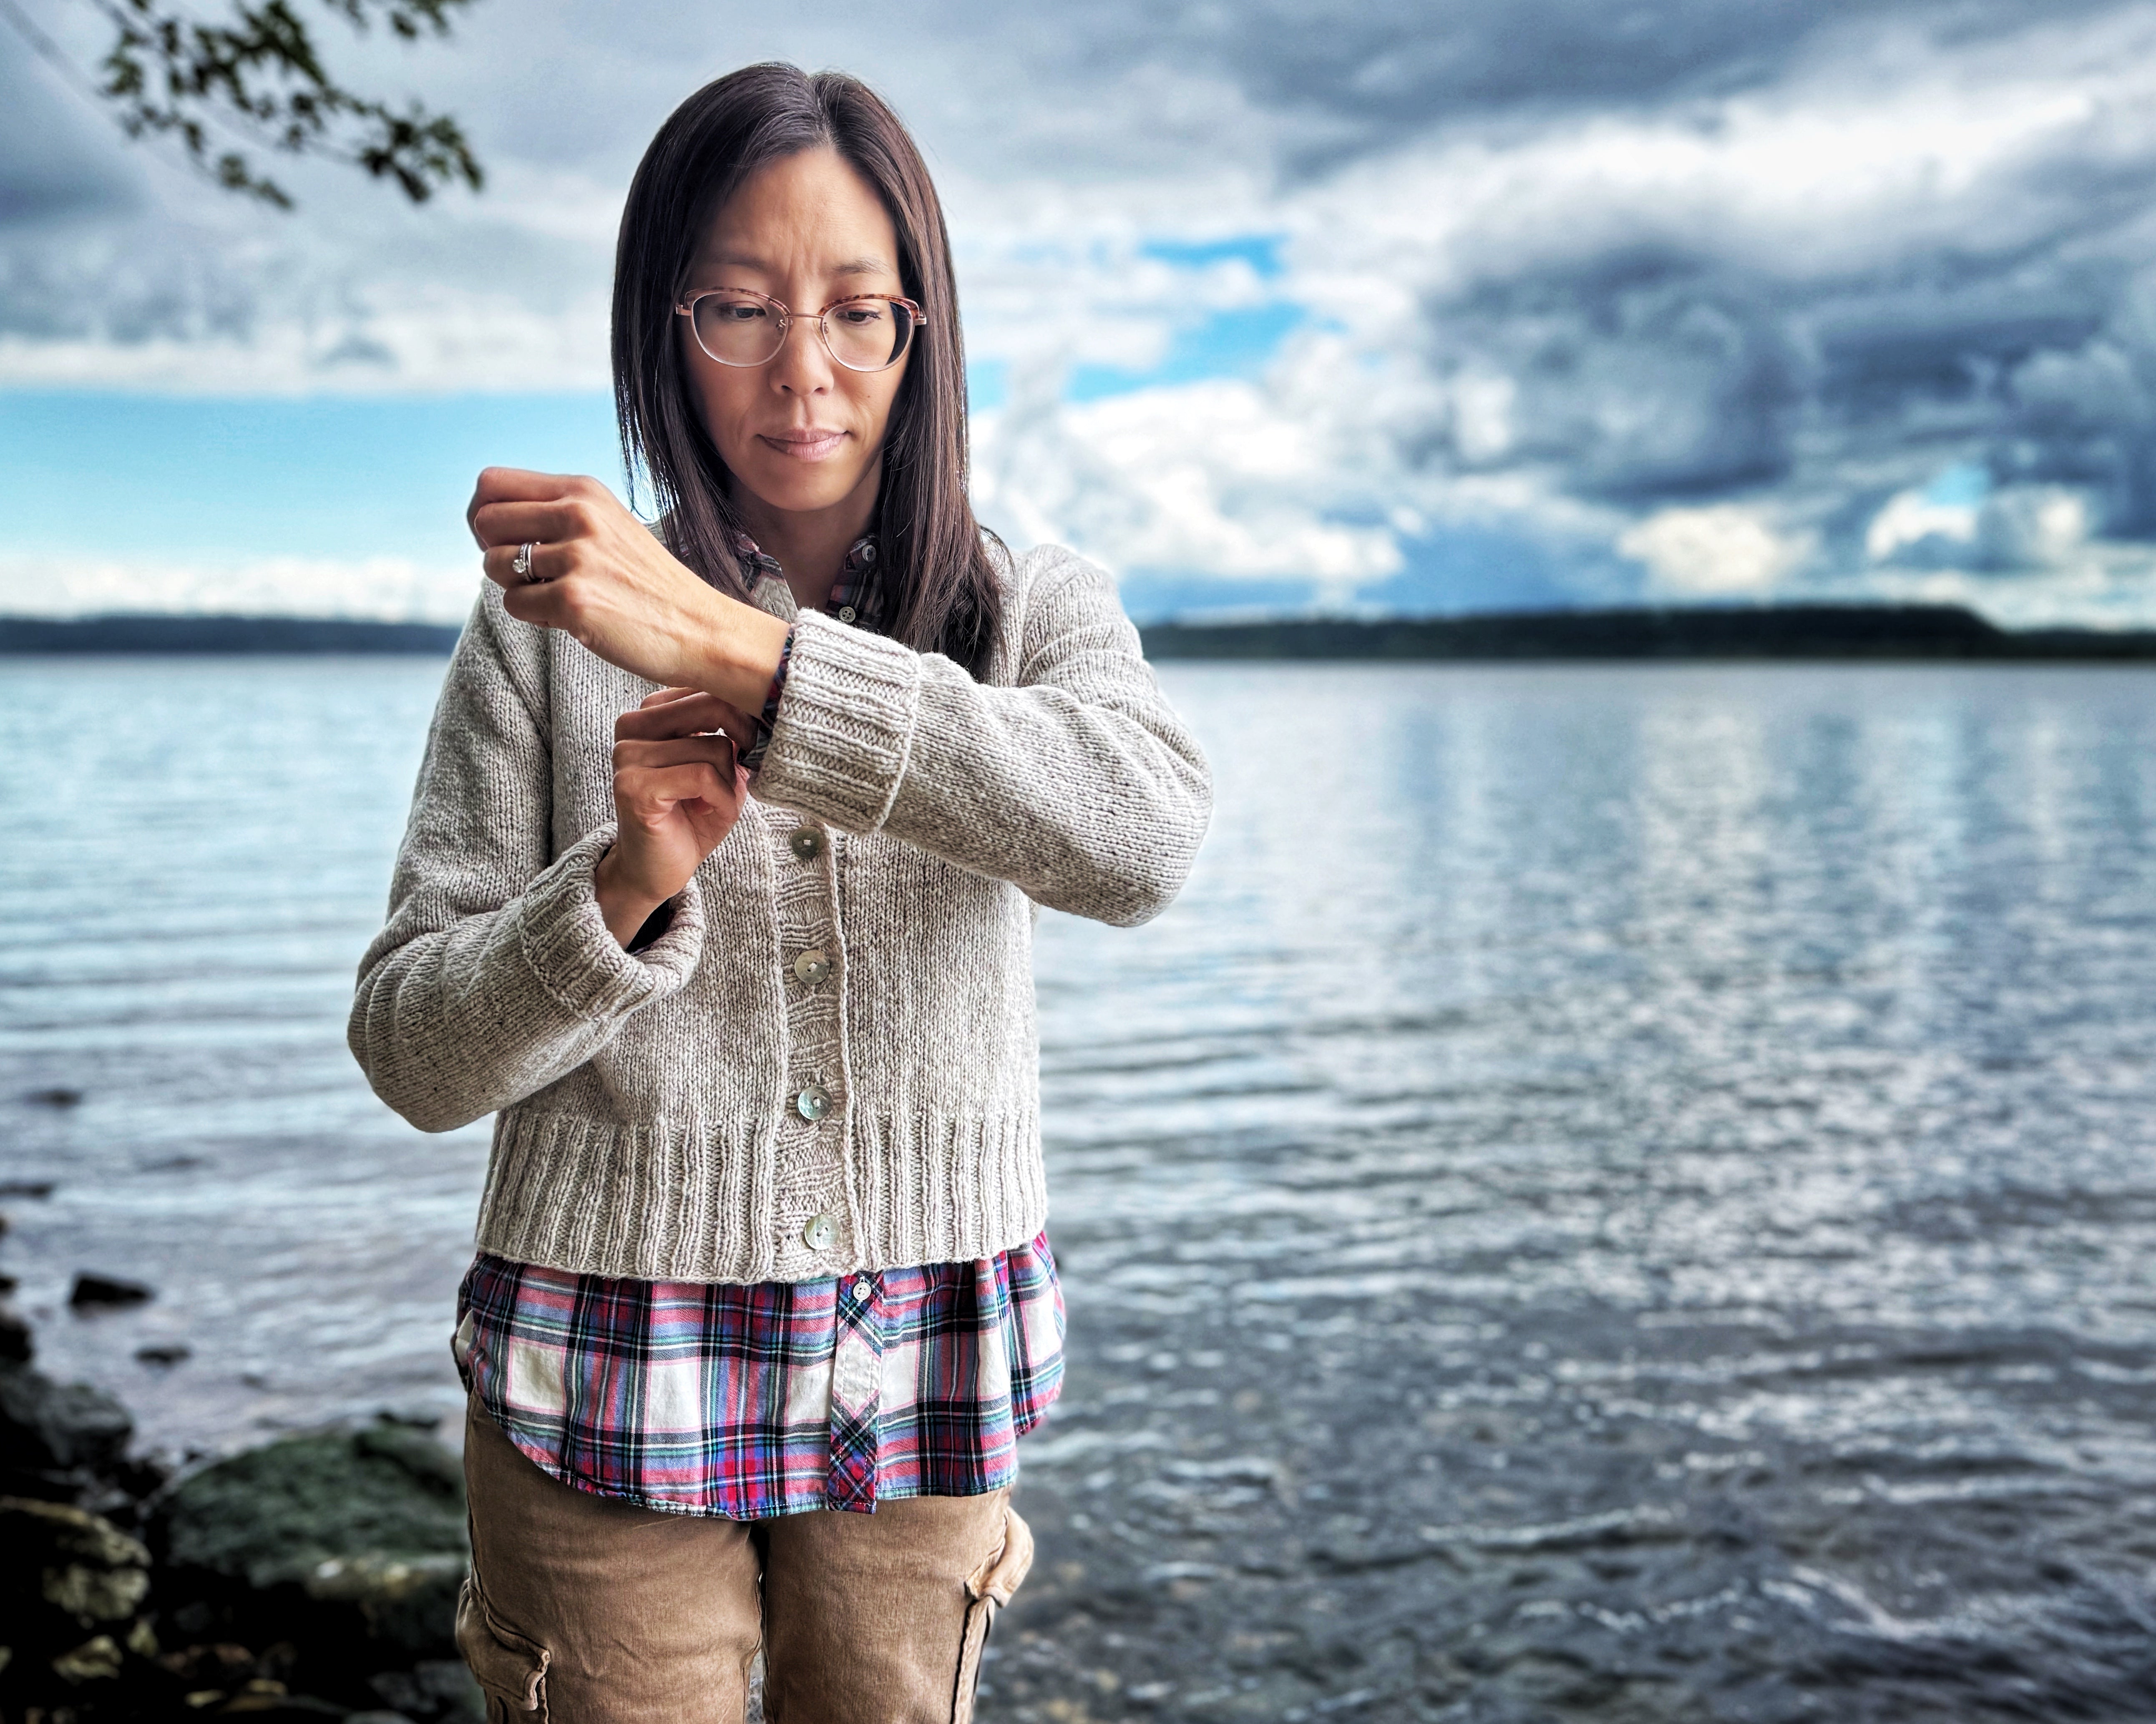
How to knit a seamless set-in sleeve sweater for a great fit
With the summer release of the Oolong Tee pattern, we introduced a new sweater construction to the Aimee Sher Makes brand - Set-in Sleeves.
And since we have a second release coming up that features a set-in sleeve, we thought it would be a great time to sit down and chat through this construction that for a long time was mainly used in seamed knitwear garments.
Why knit a set-in sleeve?
So why knit a set-in sleeve? If you are looking to achieve a more classic, pieced design look, they are the way to go. This style of garment is universally flattering as it emphasizes the natural lines of the human body, rather than creating lines that cut across it as seen in raglan or drop shoulder garments, which today are the dominant construction styles in knitting patterns.
A well-fitting set-in sleeve provides contouring to allow the sweater to fit snugly and securely around your upper body, including the upper chest as well as the neck and shoulder area. We find this particularly useful in a cardigan, as it prevents the dreaded slippage that sometimes happens with less structured garments

Set-in sleeve garments also allow for a more full range of movement with minimal excess fabric under the arms as the construction is more anatomical in shape. The armhole curve and armhole shaping gives you a really classic style line which is beautiful aesthetically. The fitted sleeves also make it easier to layer under other winter layers.

Seamed vs. seamless set-in sleeves
While some knitters may not love the process of seaming a garment, there is something to be said for the structure that a seam provides a sweater over time. Although a seamless set-in sleeve sweater construction doesn’t fully replicate this structure, it does provide the garment a small amount of reinforcement at the shoulders that will provide it more structure and allow it to hold up better over time. Plus, the look of set-in sleeves is nearly indistinguishable knit this way compared to seamed, so you can still achieve that classic look.
We’ve seen sweaters in the set-in construction have knit in the round tubes for sleeves without any sleeve cap shaping, but that’s not what we have done in either of our patterns that feature top-down set-in sleeves.
But, why not just pick up the stitches and proceed to knit the sleeve in the round similar to a drop shoulder sweater? Because you will end up with a cylinder that sticks out at a right angle from your sweater’s body which doesn’t mimic the natural curve of the human arm toward the floor - ultimately causing awkward pulling across the top of the sleeve.
Since they are picked up and knit mostly in the round, it can be hard to visualize how you're working to shape the sleeve cap, so we're here to demystify it. So let's jump into how seamless set-in sleeves work to give you a great fit.
What makes up a set-in sleeve cap?
There are three parts to a set-in sleeve cap - the upper cap, mid cap, and lower cap. Each of these sections have their own geometries at play that when added together allow for what would otherwise be a straight tube to curve beautifully around the upper arm. Don’t worry though! I won’t get too deep into the math, but will explain a tiny bit of it along the way.
For now, just know that the three sections of the sleeve cap need to contour to match the body’s natural curves. Extra fabric is needed in the upper cap to accommodate the curve of the body where the arm meets the shoulder without pulling. From here, less fabric is needed along the midcap to ensure the sleeve fits smoothly across the upper arm.
Finally, because the stitch count required to form a sleeve cap that doesn’t choke the wearer in the armpit often times means more stitches are picked up than are needed in the bicep, you will work some decreases near the underarm to remove excess fabric and further bend the angle of the sleeve to imitate a human body.

Let’s build the sleeve cap!
Before we get started picking up stitches, I think this is a good time to answer a question you might have around the starting point for our set-in sleeves. You will notice that our set-in sleeve patterns have you begin picking up stitches at the upper cap rather than the lower cap, or underarm - for knitters that are familiar with drop shoulder sweater construction.
While the reason will become more clear as we move along, for now know that this is to eliminate an extra partial row along one side of the sleeve that would result from picking up stitches starting at the underarm and then working your way back up to the upper cap to begin shaping. In other words, all shaping in a seamless set-in sleeve cap occurs top-down.

If the following sections about how we’re going to build the sleeve cap seems intimidating for you, don’t worry. We’ve worked out all the math and all the grading so all you have to do is follow along, and before you know it, you’ll have a gorgeous sleeve cap!
Picking up stitches
The first thing we need to do is set up our sleeve cap sections while picking up stitches. We begin picking up stitches in the upper cap by placing stitch markers on either side of the shoulder seam and halfway through the underarm stitches. We do this for two reasons.
- As stated above, it eliminates the asymmetry that would be caused from beginning at the underarm.
- Since this sleeve cap is shaped using german short rows, we are able to keep the double stitches next to the edge or “seam” so they are discreet and lie nicely against the body and ultimately provide the sleeve a firmer join.

As you pick up stitches, you will notice that there is a varying rate to the pick-up instructions around the armhole. As previously mentioned, this is to account for the different amounts of fabric needed for each section of the sleeve cap. At the top of the sleeve head, near the shoulder seams at the top of the armhole, for example, you need a little more fabric to go over the curves of your shoulder joint neatly, while the diagonal of the way the sleeve will drape mid-cap requires fewer picked up stitches.
Curving the upper cap
Once stitches have been picked up all the way around the armhole beginning and ending at M-1, the next step begins.
There will be an initial set of short rows worked closely together on either side of M-1 and M-2 to provide the extra fabric needed here. This will also make sure that the sleeve cap is built up with a gradual curve, eliminating any corners across the top of the shoulder.

Building the mid cap
In the mid cap, short rows are worked quickly after each previous turn to angle the mid cap steeply down toward being parallel to the floor.

Shaping the lower cap
Once we have reached the point where the sleeve cap is parallel to the floor, or perpendicular to the sweater body, stitches are decreased before the underarm areas to eliminate bulk and reach the final bicep measurement. Here you will carefully work a number of decrease stitches where you knit or purl your double stitches along with the next stitch.
Tip: Take note of your bicep measurement against the recommended ease of the pattern in your size. If you need to build in more ease, you are able to complete a “full bicep adjustment” by eliminating some or all of these decreases. You can then choose to incorporate these extra stitches evenly throughout your sleeve length, or simply work to the next largest wrist. Wrist circumference doesn’t vary widely between our sizes so you can safely move up a size or two for more room at the wrist as well.
Join in the round
After the lower cap decreases are complete, you will work a number of final short rows across the underarm stitches. The sleeve is then joined in the round and you can proceed with following the decrease instructions for your size.

You’re done! Easy as strawberry rhubarb pie.
Conclusion
We hope this article helped to not only demystify set-in sleeves for you, but serves as a useful tool to use alongside our patterns when knitting a set-in sleeve for the first time. Again, we love this particular construction because of the timeless and tailored look it achieves when knitting garments with less positive ease than some of the other patterns we have.
Before you jump into set-in sleeves, you will need to choose a size that fits around the shoulders perfectly so that it contours your particular body. This way, you can achieve the perfect fit. This means that you need to choose your size based on your upper bust!
Don’t know where to start? Here are a few more blog posts we have for you.
- How to choose a size to knit
- How to measure your body for bust darts (aka Full Bust Adjustments)
- How to measure your armhole depth
And if you’d like to find out more or knit a set-in sleeve pattern (and we have many more planned), check out the collection here:
1 comment
Thank you very very much for this excellent post! As a larger knitter who loves to make sweaters, I have more than a few where the upper sleeve area is much too floppy and voluminous. I have been considering making a sweater with a set-in sleeve, but I thought the sleeves might come out too tight. Your post explains the construction extremely well and has given me the confidence I need to dive in! Thanks again!
Katherine Rondeau
Leave a comment
This site is protected by hCaptcha and the hCaptcha Privacy Policy and Terms of Service apply.